Showing posts with label random. Show all posts

Friday, January 23, 2015

Then and now

I'm a perfectionist. I don't look at old art pieces as finished and done - I look at them like open-ended projects. As I feel like my skills improve, I go back and improve what I've created.

I originally drew/colored an Invader Zim piece for a friend right before the first convention I did (Aki-Con) back in 2012. Recently (a few months ago) I sat down and reworked it, using the original line art and pencil textures but adding some new colors, lines, and textures and changing it into something I felt looked more finished.

Here's an animation that first shows the original piece, then transitions into the final piece:


 It's been a productive past few years, I think ;-)

 ~m.d.

Tuesday, April 8, 2014

Draw a Bird Day

I learned by random chance about a holiday on April 8th (today!) called "Draw a Bird" Day. Intrigued, I visited the website to learn more about why people draw birds on April 8th:

In 1943, Dorie Cooper was a 7 year old living in England. Her mother took her to a hospital in to visit her uncle who was wounded in the war. While they were there, Dorie's uncle was very distraught, having lost his right leg to a land mine. In an attempt to cheer him up, she asked him "Draw a bird for me, please" Even though he was unwell, he decided to do as Dorie asked. He looked out his window and drew a picture of a robin.

After seeing her uncle's bird picture, Dorie laughed out loud and proclaimed that he was not a very good artist, but that she would hang the picture in her room nonetheless. Her uncle's spirits were lifted by his niece's complete honesty and acceptance. Several other wounded soldiers also had their day brightened by the event and every time Dorie came to visit thereafter, they held drawing contests to see who could produce the best bird pictures. Within several months, the entire ward's walls were decorated by bird drawings.

3 years later, Dorie was killed after being struck by a car. At her funeral, her coffin was filled with bird images that had been made by soldiers, nurses and doctors from the ward where her uncle had been. Ever since then, those men and women remembered the little girl that brought hope to the ward by drawing birds on her birthday, April 8th.

Draw a Bird Day was never declared an official holiday, but it grew through those soldiers and medical personnel and their families. Today, it is celebrated world wide as a way to express joy in the very simplest of things in life and as a way to help soldiers everywhere forget war and suffering even if only for a short time.


~ as taken from dabday.com ~

Always happy to have an excuse to draw, I decided to sketch a robin of my own to celebrate the joy of art's beautiful place in our lives:


This was a ballpoint pen sketch on a large sticky note (I was on a break at work when I drew it, those were the drawing materials at hand) that I took a picture of with my cell phone then lightly colored in Photoshop. I wanted to give my robin the red breast that makes the bird so distinctive!

Friday, October 18, 2013

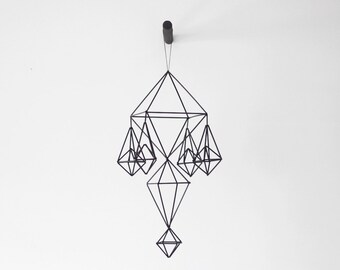
Himmeli

Have you ever heard of himmeli? I hadn't until I happened to stumble across some on etsy. I had no idea even really what I was looking at - all I knew is they were beautiful, geometric mobiles.

(a photo of a group of himmeli from HRUSKAA on etsy)

Himmeli is actually a traditional Finnish Christmas craft - a mobile created with hay/straw threaded on strings. You build the lines of your geometric shape using lengths of straw and tension from the string to hold everything taut. Modern himmeli are created substituting plastic drinking straws for the hay. The word "himmeli" comes from the Swedish word "himmel" meaning sky or heaven.

Visually the effect of the clean, minimal aesthetic is very appealing to me. However, the price tag for the himmeli I saw on etsy were NOT so appealing (haha!). So I googled a tutorial and made my own attempt(s).

The tutorial I found actually suggested trying wire instead of string, so the first himmeli I constructed I used wire. I also couldn't find black drinking straws (and I wanted black), so I settled on coffee stirrers (worked just fine, btw).

For my first himmeli, I followed my tutorial to the letter creating the shape of the bottom portion (the tutorial was only for a single himmeli shape) - for the top portion I did more of a "freestyle" geometric shape that evolved as I built it.

(an in-progress shot of me building my himmeli on my bedroom floor)

The result was BIG - and a bit busier than what I wanted. However, it was an experiment and I was just happy that it all came together:


I ended up hanging this creation in my little brother's room - sometimes I make things and randomly hang them from his ceiling. No, really I do. So when he found this was in his room, he had a minimal reaction to it (the life of having an artist as a sister, right?).

Before starting on my next attempt, I took a minute and visualized what I wanted my end result to look like. I knew I didn't want anything too elaborate or complex, since my wall space is pretty busy (in fact that blank white wall that is setting off the himmeli in these pictures usually has a giant oil painting on it)  - something simple and dramatic, with a touch of minimalistic whimsy. I knew I had seem diamond shapes and decided to include one of those in my design (wasn't hard to figure out how to make that shape from the shape I had the tutorial for). Also, knowing that string and not wire is the more traditional way to build a himmeli (and feeling that using string would eliminate the complaints I had about the process when I was using wire), I decided to use string for my next design.

The result was two (much) smaller mobiles I hung next to each other:


I was VERY happy with my end result. I felt it's perfect for the space, and it's so cool to look at. Plus, it was 3am by the time I finished these, so I was too tired to really be anything but satisfied with the night's work and ready to sleep!

I plan to hold on to my tutorial and extra supplies - when I have more space to call my own, I think I could happily share it with a few more himmeli ;-)

~md

Saturday, September 14, 2013

D&D Figurine

Recently my brother started playing Dungeons and Dragons. He's really gotten into it - he purchased his own set of the dice, and then more recently purchased a figurine to represent his character in the game. When I saw it glaring white and plain, I asked him if he planned to paint it. At that moment his eyes lit up-  not because I'd inspired him to paint it, but he'd realized who he could ask to paint it for him . . .


The figurine is pretty small, standing at about 1 3/4." I was joking I'd have to use eyelashes to paint in the details!

Here's what the figurine looked like before I started - as purchased:


Lots of details in the sculpt, so I knew it'd be fun to paint - working to highlight those details.
After several hours of painting, I was finally finished. . . Ta-dah!


The shield was blank, so I decided to paint in a dragon-like design. I didn't have a brush fine enough to do what I really wanted, but it turned out looking really cool even though it's more of a fancy squiggle than a dragon.
When it came to colors, the only request my brother made was a green cape.

This picture helps show the scale:

After he dried, I sprayed him with several layers of a matte protective finish - hopefully he'll last through many "adventures" for my brother.


~md